> ## Documentation Index
> Fetch the complete documentation index at: https://docs.livepeer.org/llms.txt
> Use this file to discover all available pages before exploring further.
# Migrate to Arbitrum
This guide provides instructions for the one-time migration from the L1 Ethereum
Mainnet to the L2 Arbitrum Mainnet, as per the
[Livepeer Confluence upgrade](https://medium.com/livepeer-blog/the-confluence-upgrade-is-live-3b6b342ea71e).
This guide is designed for node operators who have not yet upgraded to a
Livepeer version `>=0.5.28`, connecting to Arbitrum Mainnet after the
`LIP-73 block`.
## Prerequisites for all chains
* Your connected Ethereum account should have enough ETH to cover gas for the
`migrate` transaction.
If you do not have ETH in your wallet, you can add some using another wallet
or an on-ramp so you can buy enough for the `migrate` transaction.
* You can complete the migration using the
[Livepeer Explorer](https://explorer.livepeer.org/migrate).
Alternatively, you may opt to sign a typed data message via `livepeer_cli`,
instead.
* Ensure you are interacting with the correct contracts. Addresses can be found
[here](/v1/references/contract-addresses).
* **If you use a contract account rather than an EOA**: You will need to
interact directly with the Migrator contract methods following the
[Contract Wallet Migration](/v1/orchestrators/guides/migrate-from-contract-wallet)
guide.
If you are not familiar with this, it may not apply to you.
* Use a `go-livepeer`
[release](https://github.com/livepeer/go-livepeer/releases) `>= 0.5.28`.
* To register your Orchestrator on the destination chain,
[bridge some ETH](https://bridge.arbitrum.io/) to pay for the transaction.
## On Mainnet
This guide applies to orchestrators who registered on-chain on the Ethereum
mainnet prior to February 14th, 2022. It can be used starting on February 14th,
2022 onward.
Once you have successfully completed the migration, this guide is no longer
applicable and you will use Arbitrum in lieu of Ethereum for all protocol
actions.
Before starting the migration process, you will need to acquire an `RPC url` for
Arbitrum:
* [Set up an Arbitrum node](https://developer.offchainlabs.com/docs/running_node),
or
* Acquire an Arbitrum `RPC url` using a third-party service (e.g.,
[Alchemy](https://www.alchemy.com/) or [Infura](https://infura.io/)).
## On Testnet
This guide is applicable to orchestrators who registered on-chain on Rinkeby
prior to January 24th, 2022.
**Note:** Once you have successfully completed the migration, this guide is no
longer applicable and you will use Arbitrum Rinkeby in lieu of Rinkeby for all
protocol actions.
Before starting the migration process, you will need to acquire an `RPC url` for
Arbitrum. We recommend using
[the Offchain Labs public testnet endpoint](https://developer.offchainlabs.com/docs/public_testnet).
Alternatively, you can:
* [Set up an Arbitrum node](https://developer.offchainlabs.com/docs/running_node),
or
* Acquire an Arbitrum `RPC url` using a third-party service,
> **For example:**
>
> * [Alchemy](https://www.alchemy.com/), or
> * [Infura](https://infura.io/)
## Migrating to Arbitrum
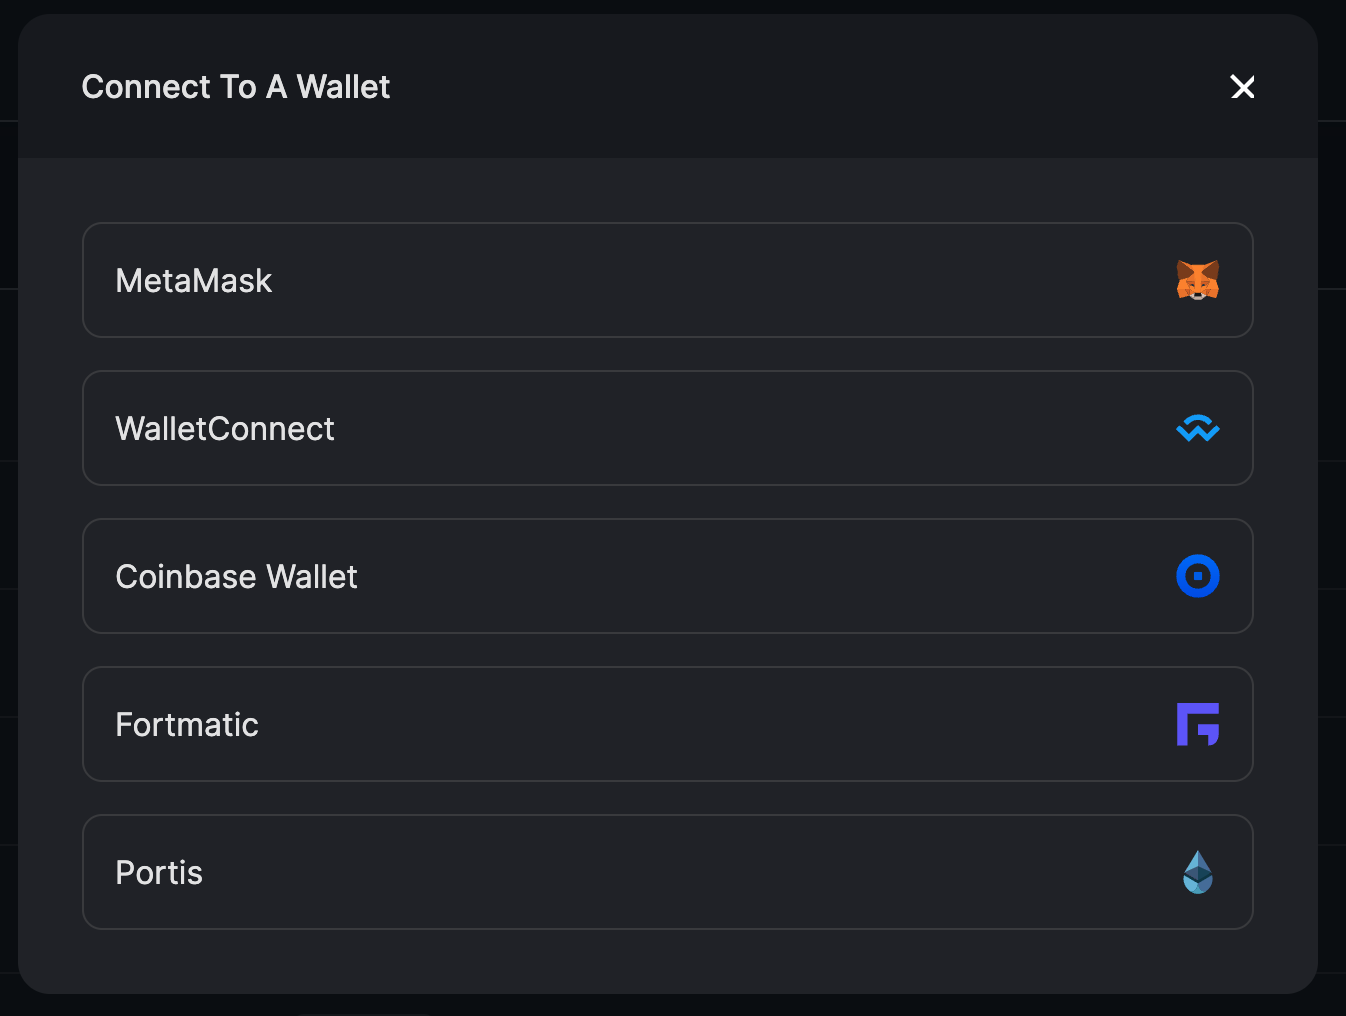
1. Connect your wallet
If you have not connected a wallet, connect one using the prompt in the upper
left-hand corner of the Livepeer Explorer.
The wallet you choose should contain a small amount of ETH to pay for the
`migrate` transaction.
> **Note:** You do not have to use the same wallet you use for your
> orchestrator. However, if you are using a different wallet to submit the
> transaction, you will still need to access the wallet that you use for your
> orchestrator so that you can sign a typed data message.
**For example:**
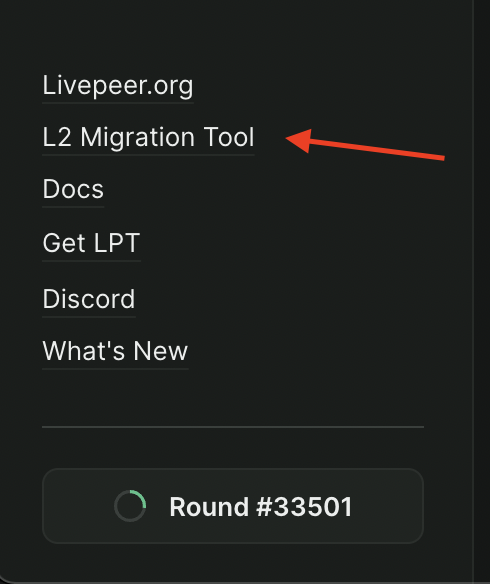
 2. Navigate to the L2 Migration Tool to begin migration to Arbitrum:
 3. Sign the `migrate` transaction:
You can sign to authorize the migration transaction with one of the
following:
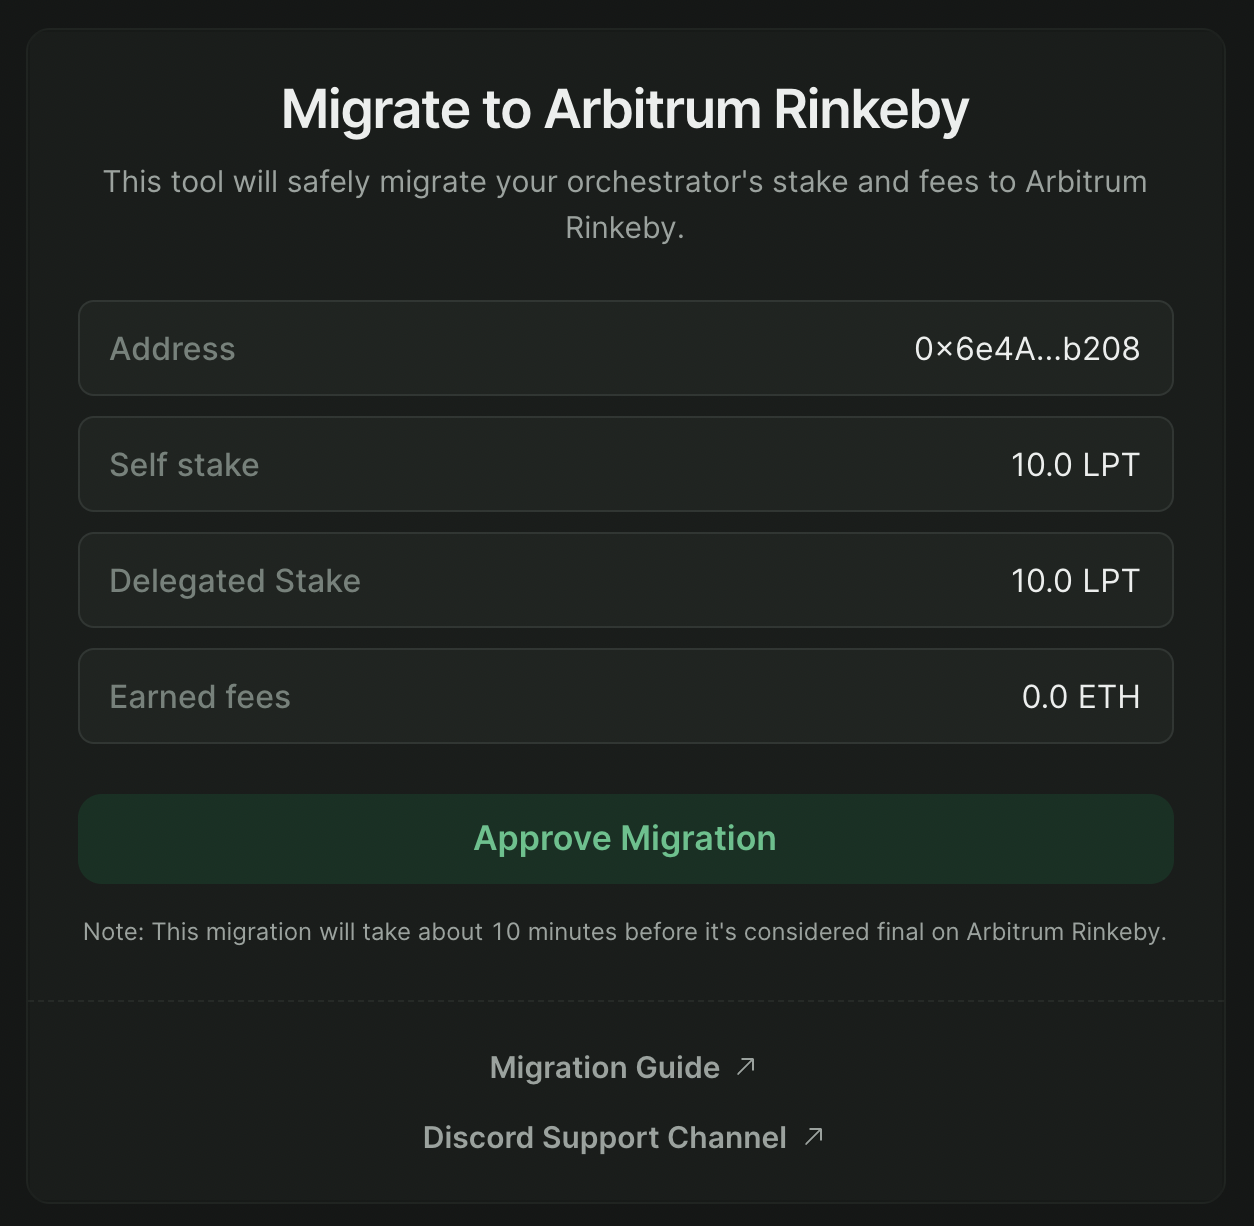
4a. Sign using a connected wallet.
If you prefer to sign using the wallet that you have connected to the
explorer, click "Approve Migration" and approve the transaction using your
browser extension.
3. Sign the `migrate` transaction:
You can sign to authorize the migration transaction with one of the
following:
4a. Sign using a connected wallet.
If you prefer to sign using the wallet that you have connected to the
explorer, click "Approve Migration" and approve the transaction using your
browser extension.
 4b. Sign using the `livepeer_cli`.
If you prefer to sign a typed data message through the `livepeer_cli`,
connect your wallet to the explorer with any other account. You will be
prompted to enter the public address of the orchestrator you wish to migrate.
> **Note:** If you are signing with the CLI and your connected wallet is NOT
> your orchestrator wallet, the stake amount will not appear until after you
> enter your Ethereum account address.
4b. Sign using the `livepeer_cli`.
If you prefer to sign a typed data message through the `livepeer_cli`,
connect your wallet to the explorer with any other account. You will be
prompted to enter the public address of the orchestrator you wish to migrate.
> **Note:** If you are signing with the CLI and your connected wallet is NOT
> your orchestrator wallet, the stake amount will not appear until after you
> enter your Ethereum account address.
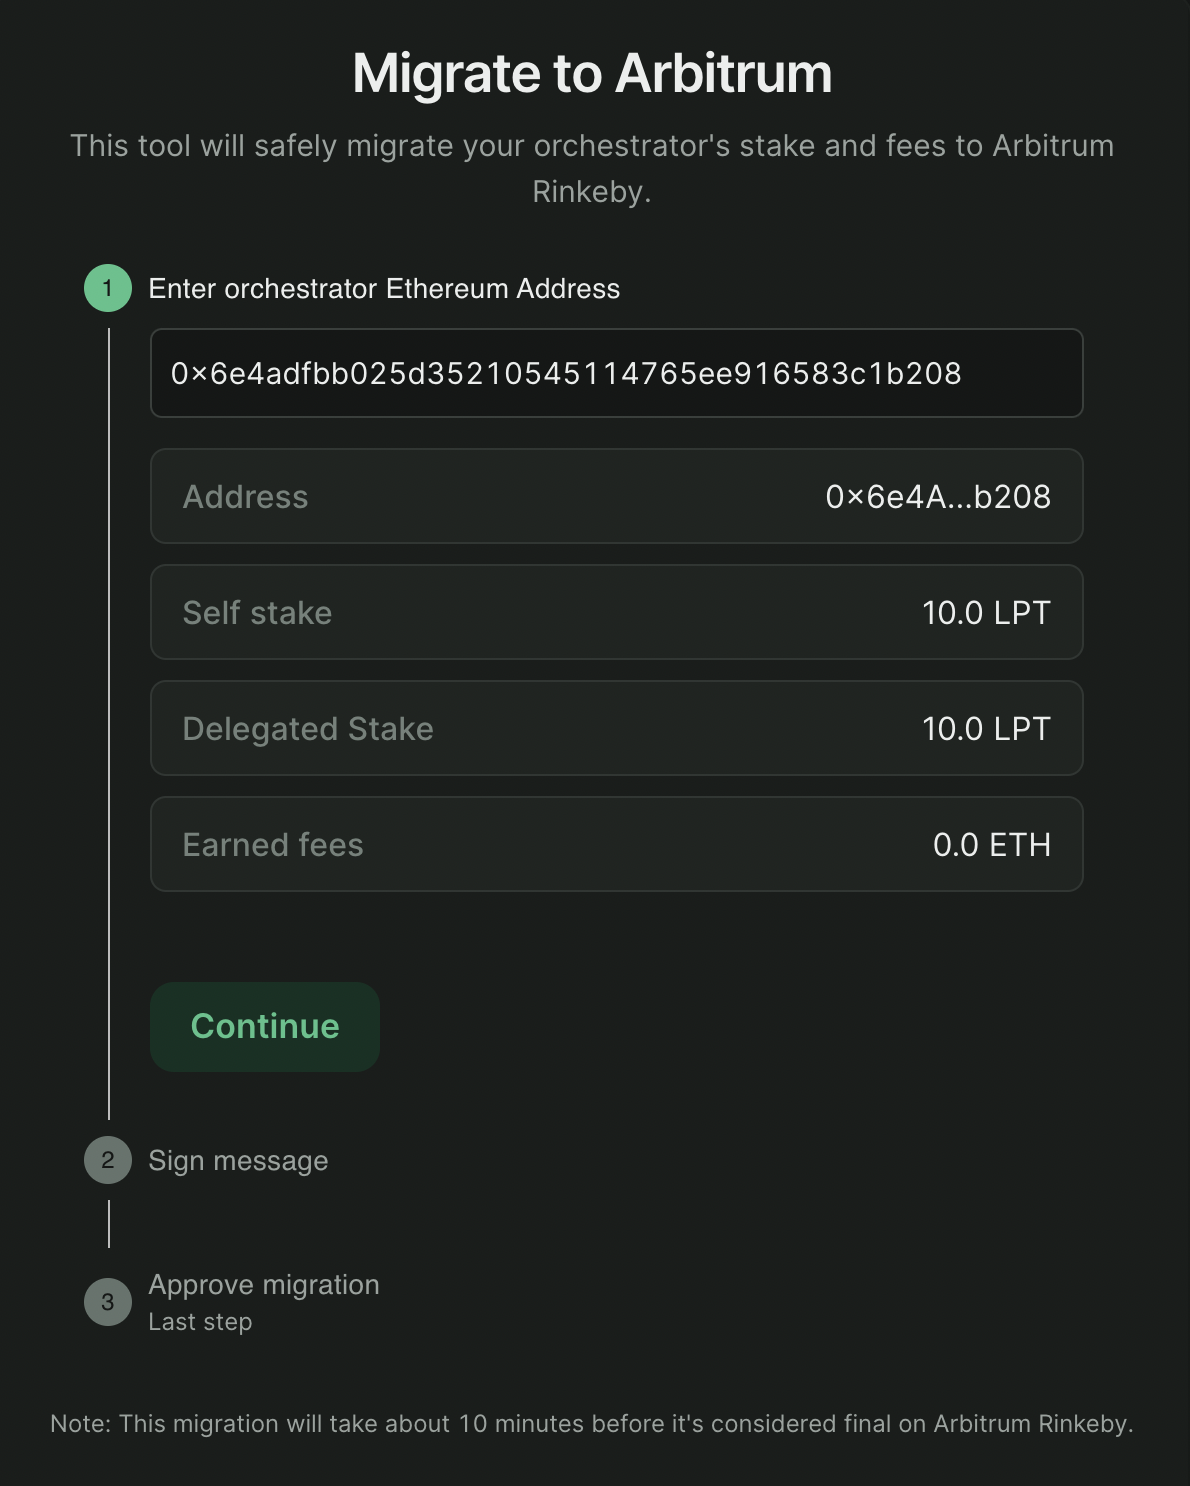 Once you have entered an address, you will see a message to sign and a text
entry box for the signature.
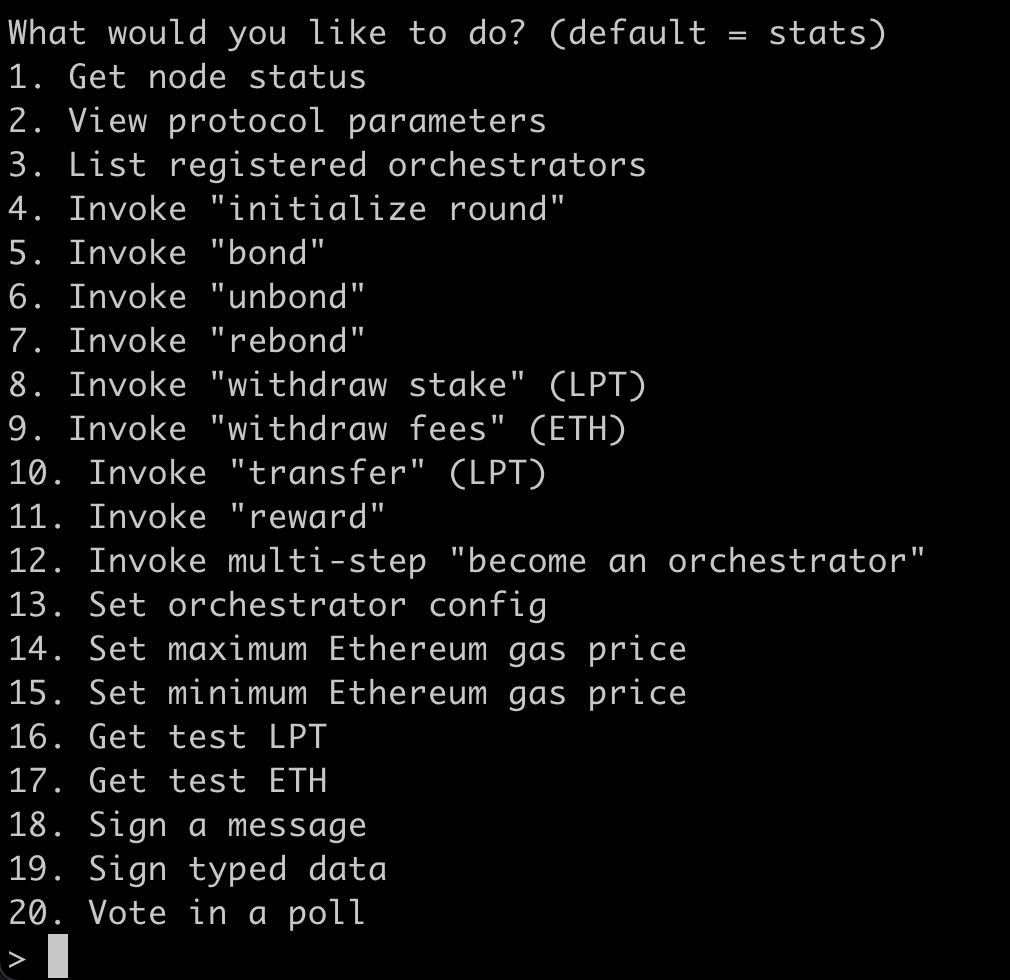
* Copy the message provided. Then go into your CLI and select option 19: Sign
Typed Data.
{' '}
Once you have entered an address, you will see a message to sign and a text
entry box for the signature.
* Copy the message provided. Then go into your CLI and select option 19: Sign
Typed Data.
{' '}
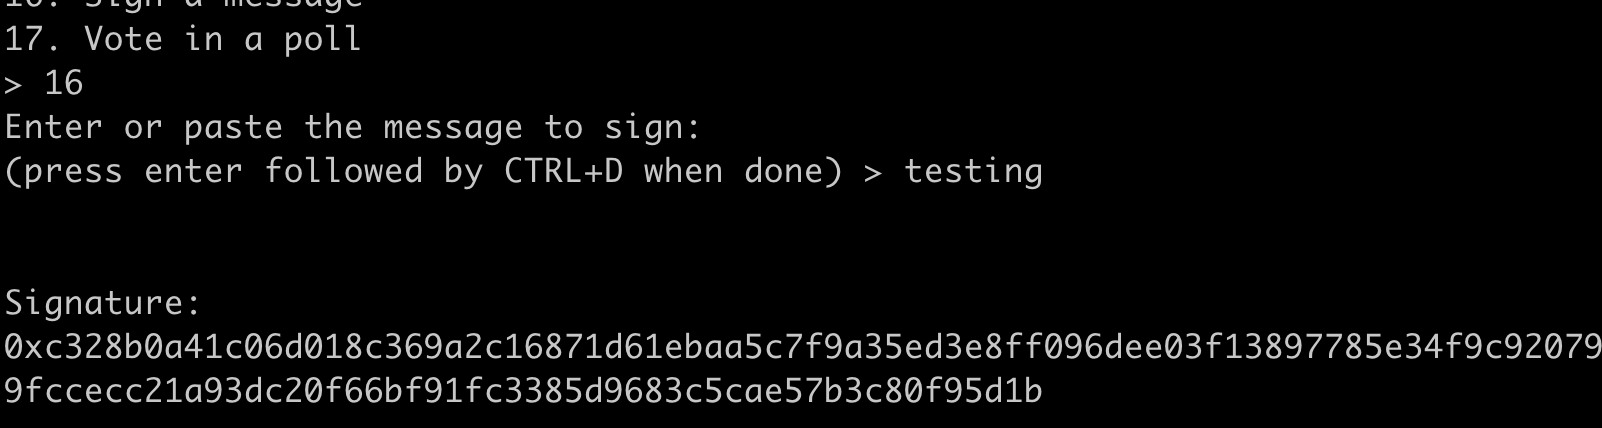
 * Follow the CLI's prompts to generate a signature.
**Note:** For `Windows` users, after pasting the typed data you will need to
type `ctrl+Z`, instead of `ctrl+D`.
{' '}
* Follow the CLI's prompts to generate a signature.
**Note:** For `Windows` users, after pasting the typed data you will need to
type `ctrl+Z`, instead of `ctrl+D`.
{' '}
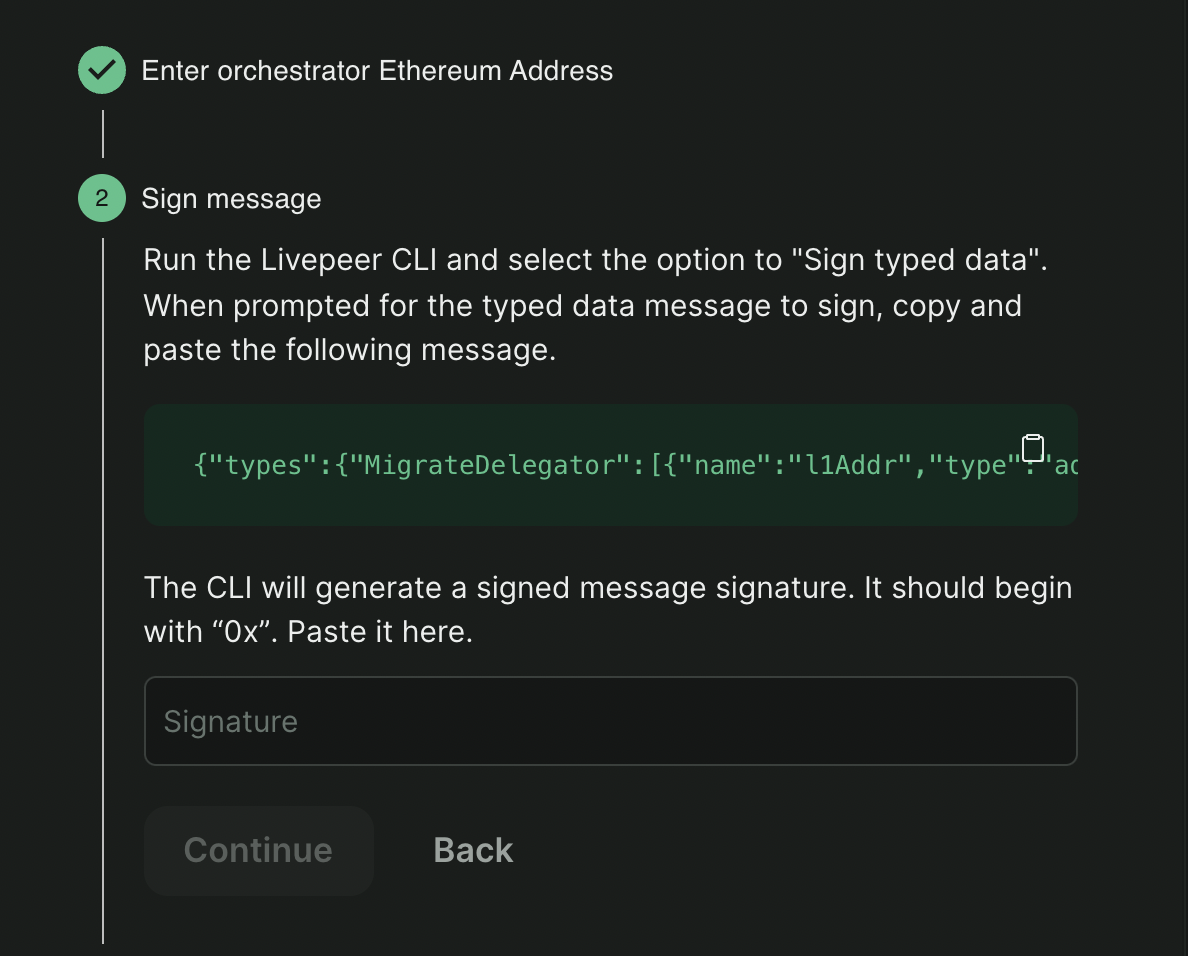
 * Paste this message in the provided box and click Continue.
{' '}
* Paste this message in the provided box and click Continue.
{' '}
 * Click `Approve Migration` to send the transaction to Ethereum. The connected
browser wallet will pay gas, but it will use the provided signature.
4. View your profile:
Once the `migrate` transaction has been confirmed (this usually takes up to
10 minutes between mainnet and Arbitrum), you should see a link to your
profile where you will be able to see your newly claimed balances.
You will see an [Arbiscan](https://arbiscan.io/) link to the `transaction id`
to view the submitted transaction.
5. Restart your Orchestrator, pointing at Arbitrum instead of mainnet as
follows:
5a. Find your Arbitrum RPC Url
> **Note:** If you prefer to run your own Arbitrum node, you should start it
> at this time. Otherwise, you should find the Arbitrum RPC Url that you
> created at the beginning of this guide.
5b. Restart your Orchestrator with an updated configuration
Once you are ready, you should restart your orchestrator using your usual
flags, changing only the `network` and `ethUrl`.
**Error Note:** If you're running on the same machine as your mainnet
Orchestrator, you may encounter an **error**:
**For example:**
You were expecting `chainID of 4`, but got `421611` instead. You may have
changed networks without changing `network name` or `datadir`.
This indicates your testnet setup is trying to access the same `.lpData` that it
used for mainnet, and it is finding a conflict on `chainId`.
**To fix this error:**
* Specify a new data directory using the `-datadir` flag when you start your
Orchestrator. Specify only the directory, not the file.
Additionally, you may need to copy your keystore to
`/.lpData/arbitrum-one-< mainnet / rinkeby >/keystore`.
```bash theme={"theme":{"light":"github-light","dark":"dark-plus"}}
livepeer \
-network arbitrum-one-mainnet # testnet: arbitrum-one-rinkeby
-ethUrl # testnet: arbitrum rinkeby RPC url
```
6. Register your service URI and fee structure on Arbitrum using
`Set orchestrator config`:
To receive work, you must register your service URI and fees so that gateways
can discover your orchestrator.
\> 6a. Select the following option using `livepeer_cli`:
`13: Set orchestrator config`
\> 6b. Acquire some `arbETH` to pay for the transaction:
* Use the [Arbitrum bridge](https://bridge.arbitrum.io) to send Ethereum on
Layer 1, to Arbitrum on Layer 2, over the appropriate (i.e. Mainnet or
Rinkeby) network.
Once this is complete, you are all set to receive work, rewards, and fees on
Arbitrum.
**Note:** In the future, you'll be prompted to connect to the Livepeer Explorer
using Arbitrum, and all future rewards and fees will accrue to Arbitrum rather
than Ethereum.
* Click `Approve Migration` to send the transaction to Ethereum. The connected
browser wallet will pay gas, but it will use the provided signature.
4. View your profile:
Once the `migrate` transaction has been confirmed (this usually takes up to
10 minutes between mainnet and Arbitrum), you should see a link to your
profile where you will be able to see your newly claimed balances.
You will see an [Arbiscan](https://arbiscan.io/) link to the `transaction id`
to view the submitted transaction.
5. Restart your Orchestrator, pointing at Arbitrum instead of mainnet as
follows:
5a. Find your Arbitrum RPC Url
> **Note:** If you prefer to run your own Arbitrum node, you should start it
> at this time. Otherwise, you should find the Arbitrum RPC Url that you
> created at the beginning of this guide.
5b. Restart your Orchestrator with an updated configuration
Once you are ready, you should restart your orchestrator using your usual
flags, changing only the `network` and `ethUrl`.
**Error Note:** If you're running on the same machine as your mainnet
Orchestrator, you may encounter an **error**:
**For example:**
You were expecting `chainID of 4`, but got `421611` instead. You may have
changed networks without changing `network name` or `datadir`.
This indicates your testnet setup is trying to access the same `.lpData` that it
used for mainnet, and it is finding a conflict on `chainId`.
**To fix this error:**
* Specify a new data directory using the `-datadir` flag when you start your
Orchestrator. Specify only the directory, not the file.
Additionally, you may need to copy your keystore to
`/.lpData/arbitrum-one-< mainnet / rinkeby >/keystore`.
```bash theme={"theme":{"light":"github-light","dark":"dark-plus"}}
livepeer \
-network arbitrum-one-mainnet # testnet: arbitrum-one-rinkeby
-ethUrl # testnet: arbitrum rinkeby RPC url
```
6. Register your service URI and fee structure on Arbitrum using
`Set orchestrator config`:
To receive work, you must register your service URI and fees so that gateways
can discover your orchestrator.
\> 6a. Select the following option using `livepeer_cli`:
`13: Set orchestrator config`
\> 6b. Acquire some `arbETH` to pay for the transaction:
* Use the [Arbitrum bridge](https://bridge.arbitrum.io) to send Ethereum on
Layer 1, to Arbitrum on Layer 2, over the appropriate (i.e. Mainnet or
Rinkeby) network.
Once this is complete, you are all set to receive work, rewards, and fees on
Arbitrum.
**Note:** In the future, you'll be prompted to connect to the Livepeer Explorer
using Arbitrum, and all future rewards and fees will accrue to Arbitrum rather
than Ethereum.